
Eventually, all web applications will encounter issues and need to be debugged. Azure provides a set of powerful tools and logs that can provide invaluable information.
Enable application logging (Windows)
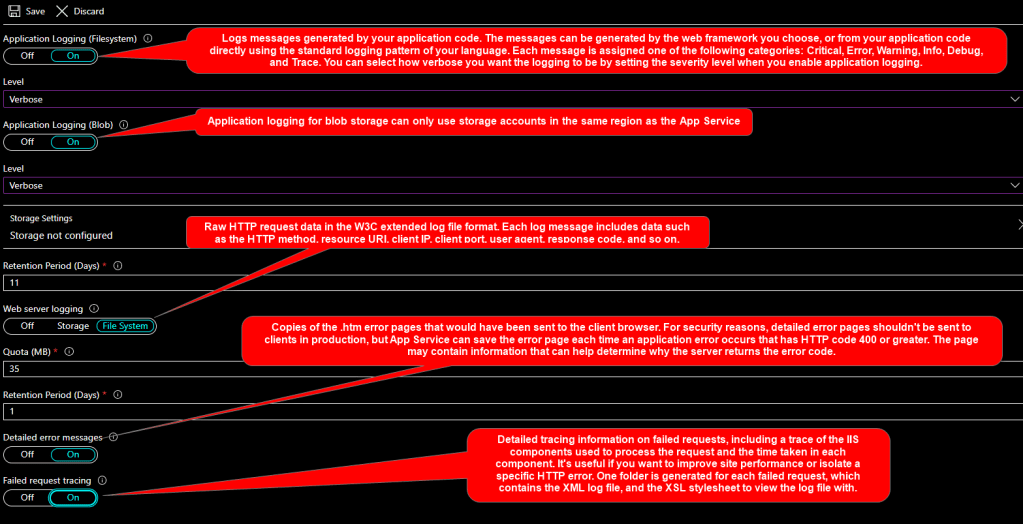
Select On for either Application Logging (Filesystem) or Application Logging (Blob), or both.
The Filesystem option is for temporary debugging purposes, and turns itself off in 12 hours. The Blob option is for long-term logging, and needs a blob storage container to write logs to. The Blob option also includes additional information in the log messages, such as the ID of the origin VM instance of the log message (InstanceId), thread ID (Tid). Application logging for blob storage can only use storage accounts in the same region as the App Service. Currently only .NET application logs can be written to the blob storage. Java, PHP, Node.js, Python application logs can only be stored on the App Service file system (without code modifications to write logs to external storage).
Also, if you regenerate your storage account’s access keys, you must reset the respective logging configuration to use the updated access keys. To do this:
- In the Configure tab, set the respective logging feature to Off. Save your setting.
- Enable logging to the storage account blob again. Save your setting.
Select the Level, or the level of details to log. The following table shows the log categories included in each level:
| Level | Included categories |
|---|---|
| Disabled | None |
| Error | Error, Critical |
| Warning | Warning, Error, Critical |
| Information | Info, Warning, Error, Critical |
| Verbose | Trace, Debug, Info, Warning, Error, Critical (all categories) |
When finished, select Save.
Enable web server logging
To enable web server logging for Windows apps in the Azure portal, navigate to your app and select App Service logs.
For Web server logging, select Storage to store logs on blob storage, or File System to store logs on the App Service file system.
In Retention Period (Days), set the number of days the logs should be retained.
When finished, select Save.
Log detailed errors
To save the error page or failed request tracing for Windows apps in the Azure portal, navigate to your app and select App Service logs.
Under Detailed Error Logging or Failed Request Tracing, select On, then select Save.
Both types of logs are stored in the App Service file system. Up to 50 errors (files/folders) are retained. When the number of HTML files exceed 50, the oldest 26 errors are automatically deleted.
